Showing posts with label FREE KNITTING. Show all posts

Monday, 31 July 2023

Mitred Squares - idea


Mitred Square small blanket (or cushion cover)

Joining the squares may seem a little tricky at first – but you will get the hang of it!

Materials: Scraps of double knitting yarn – or colours of your choice.

Size needles for yarn used.

Crochet hook for edging (if required)

Even rows are Right Side

Uneven Rows are Wrong Side

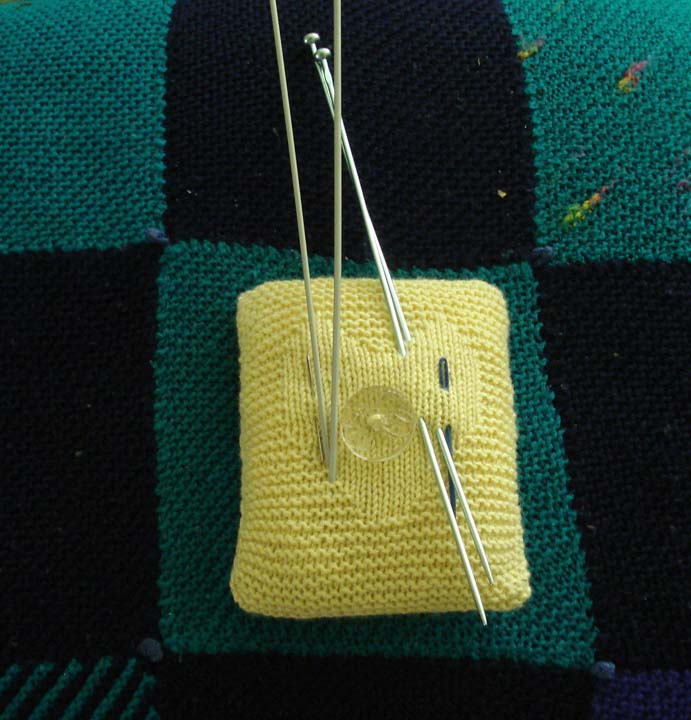
I sew a small piece of thread on the right side just so I know easily which side I’m on,

and for putting them together.

Pattern for each square:

Cast on 21 stitches.

Row 1  (WS):  k

Row 2  (RS):   slip 1 kw, k8, slip 1, k2tog, psso., k 8, P1

Row 3: (WS) slip 1 kw, k to end (minus 1), P1.

Row4: slip 1 kw, k7, slip 1, K2tog, psso., k7, P1

Row 5:  (WS) slip 1 kw, k to end, minus 1, P1.

Row 6: slip 1 kw, K6, slip 1, K2tog, psso, K6, P1.

Row 7: (WS) slip 1 kw, k to end, minus 1, P1.

Row 8:  slip 1 kw, K5, slip 1, K2tog, psso, K5, P1.

Row 9: slip 1 kw, k to end, minus 1, P1.

Continue is this manner,  decreasing by 1 stitch on RS rows, until you have 1 stitch left – pull wool through to secure.

Joining:

Make 2 mitred squares with ‘seam’ pointing upwards, so you can join them.

Place them so you will see a ‘V’ shape in the middle of the two.

Pick up 10 stitches along the inside edge of right hand square,

k1 stitch in centre when joining in the next square,

pick up 10 stitches on 2nd square – you should then have 21 sts, and can therefore begin knitting another mitre – thus joining them up. 

Note that the ‘seams’ should all be facing upwards straight.

You will have to turn the piece upside down to knit in the 4th square. 

Knit more squares as necessary to make blanket larger.

Continue in this way, and make your piece the size you require by adding extra squares, and joining them as directions given.

As long as you keep the ‘seam’ upright in your view, you will understand where you have to knit the next square -  (hopefully)!

There will be lots of ends on the wrong side, to either sew in or - - use your crochet hook to pull through yarn and secure and cut off the ends to neaten.

SRI 31.7.23.


Monday, 8 June 2020

Knitted basket 'n balls


Cast on 20 stitch and garter stitch for about
10 or 11 'ridges' (1 ridge = 2 rows) in your choice of each colour.
You should have 10 sections.
 3, 2 3, 2.
Knit 2 lengths, and stitch together, leaving one side open.  (I kept the width side open.) Stuff lightly with washable wadding/stuffing. Stitch up remaining seam.
Sew (small tacking or backstitch) between each colour = quilted effect


Make a 2 base pieces, - (I winged this more or less) -
Measure or count the rows, not forgetting that you can stretch this slightly.  Stitch pieces together. 
Place inside and stitch to 'outside'.
  
I made a couple of handles. See top pic.

The easy knitted balls are in my previous Post:
http://beadbag.blogspot.com/2020/05/knitted-ball-very-easy.html


Monday, 25 May 2020

Knitted Ball - very easy

pic.1
pic.2
Materials
Double Knitting Yarn (Rainbow colours)
2 x 2.50 or 3mm needles 
large eyed sewing needle
Washable wadding suitable for childrens toys.

Cast on 10 stitches, using thinner needles than normal, so that rows and stitches do not gape and are tighter together.
Knit 10 rows in each of 4 colours.
Cast off. (pic.1)

On second square down, cast on 10 stitches along right-hand edge,
and knit another 10 rows. Cast off. (Pic.2)
Repeat this on the opposite side, so you have a crucifix shape. (Pic.3 and 4)

On the wrong side, stitch the seams into a cube shape, leaving 'the lid' with one side un-stitched and open.  
Turn right side out.  
Stuff with wadding, so ball is stuffed but still soft. 
Stitch up remaining seam. (pic.4) - to complet ball.

pic.3

pic.4


Wednesday, 17 February 2016

FREE PATTERN - knitted small bag and fingerless gloves

This little bag is knitted from 2 diagonal-knit squares (changing colour halfway)

Using Sock Yarn and approx. 3.25 needles
You can, of course, use Double Knitting yarn, with larger sized needles - to make a larger bag. 

Diagonal-Knit Square:
Cast on 3 stitches.
K. one row.
Knit all rows -  increasing in the last stitch on each row until you have half-triangle shape to the size you want.
Begin your decreases - again at the end of each row - K2tog. until  you have completed your square and have 3 stitches left.  
Cast off 2 sts. and thread yarn through last loop, pull gently.  
You should then have a diagonally knitted square.

On each Square, I then picked up all stitches on one edge, Stocking Stitch a few rows, so that the piece curls over.  I stitched this to the 1st row thus making a tube for the (knitted) cord to pass through.

Link for Mitts

Friday, 27 November 2015

Fingerless Mittens - double knitting yarn - Free Pattern


This ribbing makes a very comfortable fit.
4.50 mm dpn needles (4 or 5)
Double Knitting Yarn
Gauge: approx. 6sts = 1" ....  slightly stretched ribbing.

I Cast On 41 stitches, onto one needle, (using the Thumb Method).
The first row divides the stitches on to your 3 needles, and I knit the last stitch and first stitch together to join - pulling gently but tightly for a couple of stitches.

Continue round in K2 tbl., P2 rib for 3.1/2" ( inches. )

Thumb:
K4 at beginning of row next row, and keep these stitches on a separate needle, so it's easy to see where the thumb stitches are.
Continue in rib as before for the main body of the mitt, but picking up a stitch* either side of the thumb on alternate rows, and Knit the thumb rows.   
Change colours when you fancy :)
*Pick up the loop before the 1st stitch on thumb needle, and pick up loop after the last stitch on thumb needle - increasing by 2sts on alternate rows.

Continue knitting Rib for main body and 'Plain' (st.st.) for Thumb, until you have 16 stitches for thumb. 
Thread these on to a longish spare piece of yarn - tie loosely, so you can undo the yarn when you try the mitt on.
Continue in rib until mitt reaches approx. 6.1/2" from the beginning -
Cast off in rib.
Go back to Thumb, picking up the stitches and rib for approx. 5 rows - cast off in rib.

You may need to knit the 1st and last stitches together to make a tighter join, or possibly add some stitches on if the thumb is too small.  
I tend to sew up the thumb seam with the glove on my hand, so it fits better and stitching cant really be seen.

If the cast on row has not joined neatly together, use the yarn tail to stitch and neaten off.

Sunday, 22 March 2015

Ribbed Fingerless Mitts - free knitting pattern


Ribbed Mitts – small/medium hand size.
Materials:
4ply sock yarn
4 dp needles (plus 1 extra for thumb stitches**) - size. 10’s (2.75 or 3mm)

Beginning:  Cast on 53 stitches – join up - using last stitch and first stitch K2tog and pull yarn to tighten. (52 sts.)
K2tbl, P2 rib for 4”

Increase for thumb gusset - every alternate round
Continuing in twisted rib, keeping the thumb gusset in Stocking Stitch - (knitting each round)
Using the first two knit stitches of your rib, pick up* 1 st before and 1 st after ..... (one stitch increase on each side of the 2 knit stitches.  
*When picking up the new stitches, pick up loop from previous row, place back on LH needle and knit into the back of stitch.  **I place these stitches on a separate needle, so it’s easy to know where the thumb increases are going to be.

Continue as above, knitting in twisted rib for main part of glove, and stocking stitch for the thumb, with increases on alternate rounds, until you have 18 stitches on the Thumb Needle.  Place these stitches on a longish piece of spare yarn and pull together – I tie a bow so that it’s easy to undo when trying the glove on.
Continue in the twisted rib for the top half of the mitt and knit to desired length – approx.  another 4” (total length 8”).  Cast off in rib.

THUMB RIB: Place the stitches on spare thread on your needles,  adding stitches across the ‘gap’ (approx.4).
You should have 22 sts.
When joining up the thumb stitches, knit 2 tog. on 2 rounds, so as to tighten the gap.
Knit approx. 9 or 10 rows in twisted rib (to thumb height wanted).  Cast off in rib.
Sew in loose ends.

These mitts are very comfortable, and easy to make.

PS: hope there are no awful errors - please let me know if you find any :) Ta.

Thursday, 17 April 2014

Granny Square Scarf - Crochet - very easy

For this very easy scarf - I crochet'd a basic Granny Square, then just continued with trebles, on one side, until I'd used up a ball of (multi coloured) yarn  (or 1/2 length required), made another one and seamed the two together.


basic pattern for the scarf continuation is: 3 trebles, 1 chain, 3 trebles.  
At the end of the row - 1 treble, 1 chain, just before the 3rd treble of previous row. Turn.
3 trebles in next space - continue with 3 trebles and 1 chain along the row.

When the scarf is finished, add a border row on top and bottom edges, 
of 1 dbl.crochet and 1 chain in each stitch - or edging of choice.

YARN: Adriafil Knitcol TRENDS - Col. 058 011
10sts and 29rows = 4" (4.5 mm)

Tuesday, 18 June 2013

Granny Square Lap Blanket - easy peasy


In the evening, I love watching telly to relax, but love to do something at the same time.  Making a huge crochet Granny Square just fits the bill at the moment.  I had some oddments of yarn, but as it grew I had to buy some more! ....  Naturally, I found the extra yarn I needed while having a clear-out :(  ............  Anyway here is my basic Granny Square Pattern:

Basic Granny Square: -
I haven't changed colours in the instructions - you can do this however you choose.

Abbreviations:
ch = chain
dc = double crochet
tr = treble


Make 4 ch. and join, with a slip st., into a circle.
Ch. 3 (which counts as the first Treble), 2 more trebles then 2 ch.
3 trebles in the ring and 2 ch., 3 times more (see pic below) - join into 3rd chain of beginning 3 chains.
(check centre of square pic. below)

Slip stitch to the nearest 2 ch. space and in each space make
3 trebles, 2 ch and 3 trebles : 1 ch. 

On following rounds:
Slip stitch to each corner space and make 3 trs.,2ch.,3 trs.
The spaces between the corners are made up of  3 trebles and 1 chain.

By repeating the above, the Square will grow as big as you make it - change colours as you fancy.
I also found the shape became distorted, but I think when the whole thing is finished you can pull it into shape.


For the final edging you could make a row of double crochet. 
If you turn your work and make this final row from the back (going in the opposite direction from before) - it makes a pretty edging.

This probably sounds more complicated than it is! - but is very relaxing ----- and useful!

PS: If I've made any errors - please let me know.

Sunday, 17 March 2013

FREE Beadwork/Cross Stitch Chart - Abstract

Abstract Design Chart
This could be used lots of different ways - Beadwork  using  Square Stitch or Brickstitch - 
cuff/bracelet, brooch/pin, motif for a personal greetings card:
Knitting or Cross stitch design - single, or using repeats.

Tuesday, 29 January 2013

Free Knitting Pattern - Fingerless Mitts


 I'm into knitting Mitts at the mo - they're really similar to knitting socks - (almost!)
small bag pattern given here

FINGERLESS MITTS 
Instructions
Basic Pattern - - using sock yarn (fine)
Needle size: 3.25 mm (double pointed set + 1)
Size: small to medium sized hand 

Using the thumb method - cast on 56+1**sts. on 1 needle.


For the first row: knitting the correct amount of stitches on to each separate needle.  Join up into your 'round' using the extra stitch: (k2tog.) thus joining up the 'round'. (Using last stitch and first stitch.)


I find this a lot less faffing about, than trying to sort out twisted needles and which is the right side.  (The Purists wont like it - but hey .............. ! :) )

Stitches on needles as follows:
28 sts (1st needle)14sts. : 14sts.  

RIB/CUFF: (knit stitches through back of loop for cuff and thumb rib only).
K1 (tbl), P1, rib for 3.5 inches, then
K 10 rounds** (knitting through back of the loops) - *or to your own length.  

**You can also continue to knit in Rib - I find the gloves fit very nicely when all Rib'd.

Once your Rib and (10)* rows have been knitted, commence the 

Thumb Gusset increases:

1. K 27, make 1 (pick up loop - between stitches - from previous round, place on left needle and K thru back of the loop, replace on right needle),  k1, make 1, K to end of row.

I tend to keep my thumb gusset stitches on a separate needle, which is a little fiddly, but saves using stitch markers - which I find a bit annoying.  I think this also makes the increasing easier to see.

2. K 1 row.

3. Repeat these 2 rows, making 1 extra stitch (at beginning and end = 2 sts) on each alternate row until you have 17 stitches as your thumb gusset - thread these onto a spare bit of waste yarn - knot yarn so the stitches dont fall off !

4. Continue knitting in the round, carefully joining up again - (pull working yarn taught when joining up on thumb edge).  
Knit until the glove approx. reaches the base of your fingers.
Rib however many rows you fancy, and cast off in rib.

Thumb: 
Rejoin yarn to stitches on waste yarn, picking up  4 stitches in the 'thumb valley'.  
Again, pull thread slightly taught so as not to get too large a hole :).  (If you do get a hole, you can carefully stitch this up afterwards!) 
Knit a few rows then Rib for a few rows (of choice) and cast off in rib.
Sew all ends in neatly.

2nd Mitt - repeat as above.

The instructions always look more complicated than they are, but once you've got the hang of it, it's pretty straightforward.  If you're used to knitting socks ..... this will be a doddle.
(I dont think I've made any errors in the pattern instructions, but if you find anything - please let me know.)

Tuesday, 27 November 2012

Free Basic Hat Pattern from Purl Soho

Purl Soho.com - everything you need! Gorgeous website - check it out.
Baby (Toddler, Kid, Women's, Men's)
12 (14, 16, 18, 20) inches in circumference
6 (6 3/4, 7 1/2, 8 1/4, 9) inches high           
Baby - about 36 yards
Toddler - about 47 yards
Kid - about 58 yards
Women's - about 69 yards
Men's - about 80 yards
Gauge: 3 stitches = 1 inch in stockinette stitch
Finished Sizes: Baby (Toddler, Kid, Women's, Men's)
12 (14, 16, 18, 20) inches in circumference
6 (6 3/4, 7 1/2, 8 1/4, 9) inches high

THE CUFF
Cast 36 (42, 48, 54, 60) stitches onto the circular needles.
Place a marker and join for working in the round, being careful to not twist the stitches.
Round 1: *K3, p3, repeat from * to end of round.
Repeat Round 1 four (4, 5, 5, 6) more times.

THE BODY
Knit every round until piece measures 4 1/2 (5, 5 1/2, 6, 6 1/2) inches from the cast one edge.

THE CROWN :
Baby: start the crown with Round 9
Toddler: start with Round 7
Kid: start with Round 5
Women's: start with Round 3
Men's: start with Round 1

Round 1: *K8, k2tog, repeat from * to end of round. (54 stitches)
Round 2: Knit.
Round 3: *K7, k2tog, repeat from * to end of round. (48 stitches)
Round 4: Knit.
Round 5: *K6, k2tog, repeat from * to end of round. (42 stitches)
Round 6: Knit.
Round 7: *K5, k2tog, repeat from * to end of round. (36 stitches)
Round 8: Knit.
Changing to double pointed needles...
Round 9: *K4, k2tog, repeat from * to end of round. (30 stitches)
Round 10: *K3, k2tog, repeat from * to end of round. (24 stitches)
Round 11: *K2, k2tog, repeat from * to end of round. (18 stitches)
Round 12: *K1, k2tog, repeat from * to end of round. (12 stitches)
Round 13: *K2tog, repeat from * to end of round. (6 stitches)

Cut the tail and thread it through the remaining stitches.
Weave it into the inside of the hat. Weave in the other ends and you're done!

Free Basic Hat Pattern - link


Monday, 12 November 2012

FREE Knitting/Crochet Pattern - Cushions - very easy


close-up of back seams

These were really easy to make (while watching telly) - using up some odd balls of double knitting yarn and some old cushions.

Needles and Hook - according to yarn used.

The central squares on the fronts are knitted, then the rest of the cushion is crocheted around the square, using single crochets - - with 3 single crochets in each corner on each round.  

At the beginning of each round, slip st. into the centre of the first 3 single crochets to make the next three.

I made each cover large enough to fit my cushion pads, when folded into 1/4s (diagonally) - see above shape in pic.
The seam edges are on the outside and are just sewn together with a straight stitch, using matching yarn colour.
Stitch 3 seams, push the cushion inside then sew up the 4th seam. 

Centre Squares:
Cast on 3 stitches.
K. one row.
Knit all rows -  increasing in the last stitch on each row until you have half-triangle shape to the size you want.
Begin your decreases - again at the end of each row - K2tog. until  you have completed your square and have 3 stitches left.  Cast off 2 sts. and thread yarn through last loop, pull gently.  
You should then have a diagonally knitted square.


That's it really.

Saturday, 27 October 2012

Knitted Haloween Beanie

I found this pattern on Whodunnknit - it's a really simple knitted beanie and you can decorate it how you want - they give you some good ideas too.

Wednesday, 25 July 2012

Free Knitting Pattern - Needle/Pincushion!


I really just winged this!  I was watching tv and fancied doing some knitting - and ended up with this!  Whenever I'm knitting and put a needle down on the sofa ...... I invariably lose it down the cushions - or somewhere they disappear to!  So it occurred to me that if I have a large needlecushion and just poke the needles into it,  I would know where they were!!   I know I should probably get out more, but if you've got an oddment of yarn and have itchy fingers .....  try this!


I used Debbie Bliss Baby Cashmerino with nos. 11 (UK) needles.
Begin by casting on 30 stitches, knit approx 6 - 7" (2 pieces) or 12 - 14" if knitting in one piece.
Stitch seams leaving a gap at the top, stuff, sew up, embroider edges if wanted, add button - that's more or less it!  Measurements are not really crucial at all.


This needlecushion measures approx. 6.5"x 5.5" (x 2 pieces or 1 long piece). 
The front is Garter and Stocking Stitch, and the back is just plain Stocking Stitch.
I knitted a heart motif into the centre - but you could knit in anything of course, and I added a large decorative button. (Click on photo to see larger image.)
You could also knit it all in stocking stitch and embroider initials on the front too.
I stitched the seams, leaving a gap at the top and stuffed it with wadding and  also embroidered a line of chain stitch on each of the long sides to make the edges look neater.

Saturday, 18 December 2010

Knitting "Log Cabin"

I knitted this as a bit of occupational therapy while watching tv. I originally made it thinking I would wad and line it with a pretty fabric, and use it as a lap quilt. However, it turned out a bit small, but fits perfectly over a beanbag cushion I'd made.

I knitted 4 mitred squares, then using the patchwork 'log cabin' technique, knitted in rounds until I reached the size I wanted, then joined them together with knitted borders and a bit of sewing where needed, - - (and crocheted a flower in the centre.)

I used the super Spud & Chloe yarn which, even though a bit expensive, is just a pleasure to knit with. I'm still not sure whether I'll knit a 'backside' or use some matching fabric ........ dont hold your breath though, as busy time of year is on its way!